Welcome to
Supurr Furbulous Greetings Pawesome Pals
Thanks for joining us for Part VI of our supurr fun Crafting with Cats re-run. We thought we'd get a head-start on the Valentine's Crafting, as the big day is now only just over a week away, so if mew want to make anything, mew should have plenty of time!
If mew missed Part I, click here to see how we made an epic heart shaped crinkle mat, and here for Part II, when we made some epic catnip hearts and kicker toys. Check out Part III for the most epic Valentine's Cat Cottage ever. For Part IV and the Best Cat Tree Glow Up Ever, click here. And for Part V click here to see the Catnip Cookies.
If mew missed any of our previous CWC posts, stop by the Crafting with Cats Page and see all our previous projects, and mew don't have to be an expert in anything to make any of them. Plus we offer workarounds and no-sew projects for those who don't like to sew.
* * *
**A quick note before we begin**
All Crafting with Cats ideas and creations are of our own design, and we share them for purrsonal/home use only.
So purrlease do not copy for commercial/resale purrposes.
Copyright ©BionicBasil®
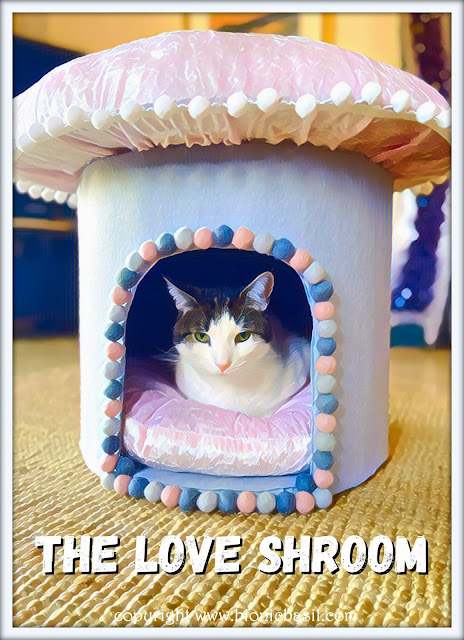
The Love Shroom
What We Used:
2 x large cardboard boxes
glue gun + non-toxic glue
wadding
white felt squares
pale pink crushed velvet
grey felt
Loose pom poms in greys and pinks
White pom pom trim
sewing machine ~ scissors ~ pins
Optional cats ~ Fudge and Pandora
Let's get Started
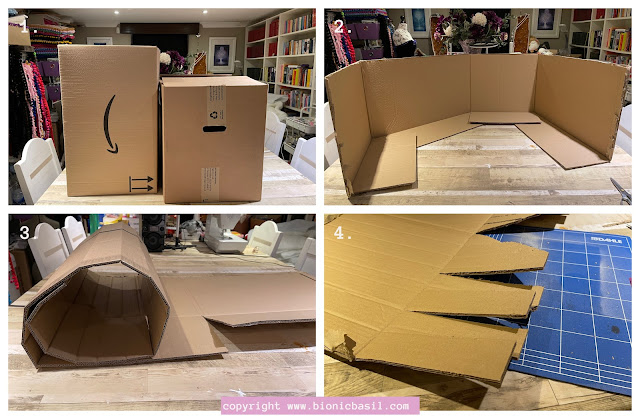
1. We used two large cardboard boxes.
2. First, we opened one box fully and cut off the top flaps.
3. Next, we rolled the cardboard to make it cylindrical.
4. Then we trimmed the bottom flaps, and cut vertically, so it made it easier when we attached the bottom in step 8.
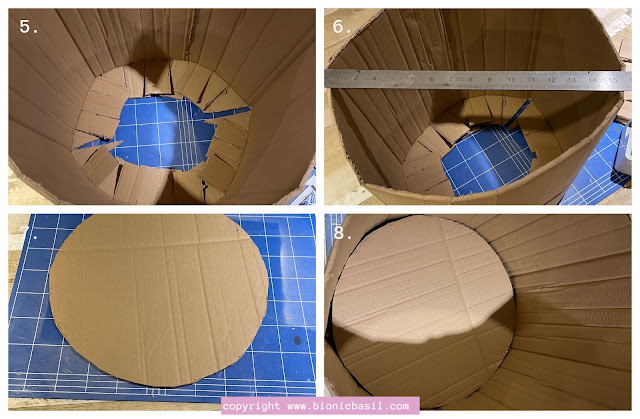
5. This is how it looks when it's rolled and the edges glued together.
6. & 7. We checked the diameter before cutting a circle to fit inside the bottom.
8. Next, we glued the bottom in place.
11. & 12. Then we drew a doorway and cut it out.
13. & 14. Using the second box, we measured for the mushroom top and made the outer rim approx 3" or 7.6 cm wider all the way around.
15. & 16. We cut it out and tried it on top of the base to make sure it was the right size.
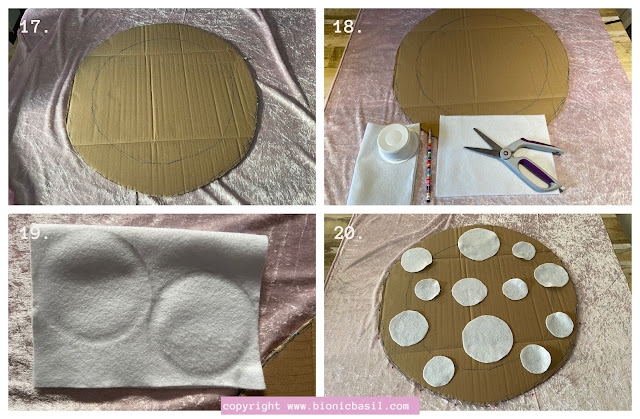
19. & 20. And then we cut out lots of white felt circles in different sizes. We placed them on the cardboard, just to get the best pattern.
21. & 22. We pinned all the way around the cardboard circle on the fabric, as our white tailor's chalk didn't show up, and we needed a guide for the edge. And then we placed all the felt circles and pinned them in place before sewing with a zig-zag stitch on the machine. Mew could glue or hand sew at this stage.
23. All the felt circles are securely attached.
24. Next we used the wadding out of an old cushion and heaped it up on top of the cardboard circle.
25. We carefully placed the crushed velvet in place, and mew can see how much extra fabric was needed. We also tried to shape the wadding, so it was higher in the middle. Then we flipped the entire thing over and glued the crushed velvet in place, pulling it taut. Think of covering a chair bottom.
26. This is the finished mushroom top, we cut off any excess fabric underneath, but we also made sure that underneath portion of the rim was completely covered, so it looks like mushroom gills.
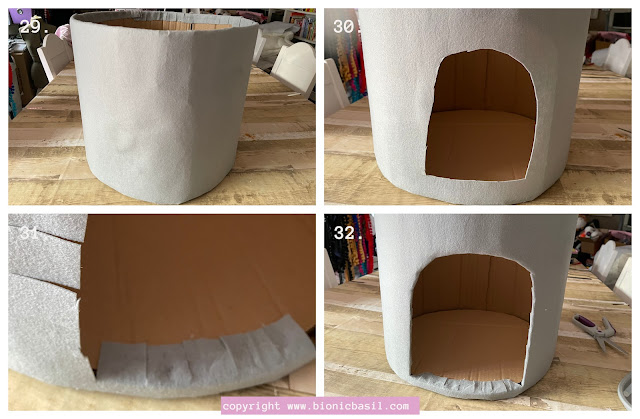
27. & 28. We covered the entire base in a light grey felt and glued it in place.
29. We snipped the felt edge like step 31 and glued it down.
31. & 32. We snipped the fabric back to the edge of the doorway and then folded and glued in place.
33. We used the remaining felt to cover the inside of the mushroom.
34. Next we got our small pom poms and began to glue them around the opening.
35. Pandora came to check on the P.A.'s progress and to make sure she wasn't slacking off! MOL
36. The pom poms look great!
38. Then we decided the top needed some pom pom trim.
39. Then we decided we had enough crushed velvet left to make a cushion.
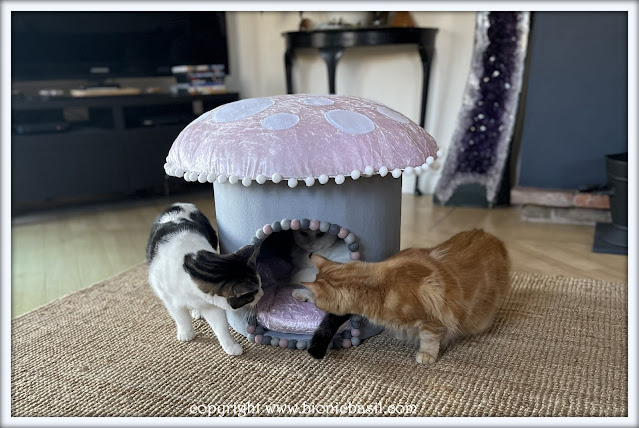
40. And here's the Love Shroom finished. Isn't it cute?
These three wasted no time at all, and as Smooch says, "Mew snooze, mew lose!" As he got there first!
Watch the video:
or watch on YouTube
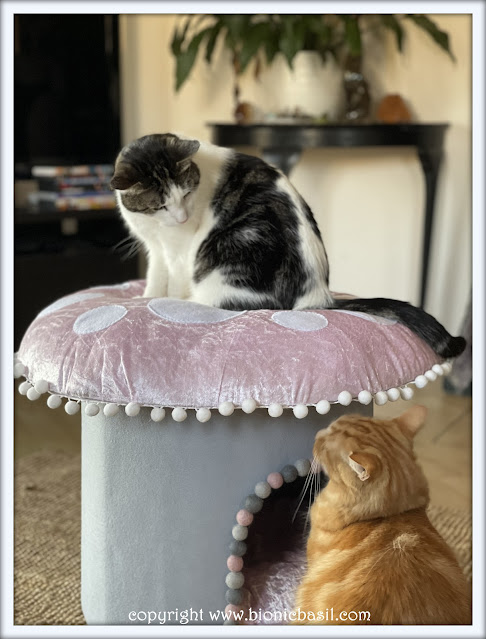
What a totally fun project to make, all the cats love it and if mew watch the video to the very end mew'll see Fudge wanted Melvyn off the top, and well just see for yourselves! MOL
We've now moved it into the upstairs lounge, we swapped it with The Observatory for something different, and Melvyn has moved out of his glamping tent and into the shroom! MOL
And that furiends furry sadly brings us to the end of today's pawesomely fun Crafting with Cats post, we do hope mew liked it. Don't forget to subscribe to our YouTube channel as we've got lots of videos there, and some of which mew might have not seen before.
We'll be back tomorrow with Chapter 14 in our brand new and the terrifically exciting, claw-biting, edge-of-your-seat adventure; if mew missed last week's installment, click here.
Epically crafty purrs and don't forget to...
Wing Commander Basil & The B Team
Disclaimer:
We at BionicBasil HQ are not responsible or liable fur any injuries to person/s and/or cat/s, crafting addictions, glue on cats, paper cuts, misplaced pins and needles, cats stealing your supplies, broken scissors, cat fur stuck on your projects, or your project not turning out as planned. By using this information you hereby agree to indemnify and hold harmless BionicBasil and staff from and against any and all claims for personal injuries or damages of any kind arising from the use of any Crafting With Cats posts we may share.
Graphics created with paid licence www.canva.com
Music Used under licence from www.soundstripe.com ~ Artist: Pala - Track: Lost Without Love









Love that one, it's totally, totally gorgeous! Thanks for joining Angel Brian's Thankful Thursday Blog Hop!
ReplyDeleteWhat fun!
ReplyDeleteThat turned out great, and the cats loved it.
ReplyDeleteWe luv yer Love 'sroom! and it looks like you luv it too! Yer PA is so furry pawy crafty fur you. I think I'd love the top to lay on. Precious
ReplyDeleteWe are so impressed with your creativity!
ReplyDeletePurrs,
The Chans
Excellent work, kitties. Your mom is so creative💗Double Pawkisses for a Happy Week ahead to all of you🐾😽💞
ReplyDeleteWhat a wonderful project and it's so cute. A huge Awww. You're all so talented.
ReplyDeleteHave a purrfect day and week. Scritches to all the kitties and a hug to mom. ♥
Wow, marvelous! No wonder all the kitties like it so much!
ReplyDeleteSo magical 🙀😻😽
ReplyDeleteI'll bet you could never make enough of those to satisfy all of your team. It's a doozy of a good sleeping place.
ReplyDelete