Showing posts with label craft project. Show all posts

Monday 30 January 2023

**CRAFTING RERUN** Crafting With Cats ~ Part XI ~ Valentines Special ~ How We Made A Valentines Heart Crinkle Mat

Welcome to
Crafting with Cats Valentine's Special Banner ©BionicBasil®

Supurr Greetings Pawesome Pals

Thanks for joining for us for a rerun of Part VII of our Crafting with Cats segment. Mew know we have so much fun making all this stuff, and we hope mew enjoy seeing it and/or making it too! 

If mew missed any of our previous CWC posts, here's how we made:


*    *    *

**Purrlease Note**

All Crafting with Cats ideas and creations are of our own design, and we share them for purrrsonal/home use only.

Copyright ©BionicBasil 

*     *     *

This week we're making a pawesome 

Crafting with Cats Valentine's Special ©BionicBasil® Valentine Heart Crinkle Mat

What We Used:

Fabric of your choosing, ours is red
Wadding/padding
Lining fabric
Plastic shopping bags ~ yes we're doing our bit and recycling

Sewing machine

scissors - cotton - pins - needle - tailors chalk or similar - ruler

Optional Cat ~ Smooch was today's Snoopervisor

Furst we suggest measuring one of your kitties to see how big your fabric needs to be, as not all kitty's are the same size.

Crafting with Cats Valentine's Special ©BionicBasil® Valentine Heart Crinkle Mat

Take your fabric and give it a quick iron.

Fold it in half and draw half a heart shape directly on the fabric with your tailors chalk, so your heart is symmetrical when mew open the cut fabric out. It's so much easier than trying to draw a complete heart on the fabric.

Crafting with Cats Valentine's Special ©BionicBasil® Valentine Heart Crinkle Mat
Cut out your heart.

Cut out two pieces of lining fabric and one piece of your padding using your furst heart as a template.

Crafting with Cats Valentine's Special ©BionicBasil® Valentine Heart Crinkle Mat
Take your plastic bags and see how many mew need to fill the size of your heart.
We used 5.
Crafting with Cats Valentine's Special ©BionicBasil® Valentine Heart Crinkle Mat
Optional kitty for testing if there's enough rustle! MOL

Crafting with Cats Valentine's Special ©BionicBasil® Valentine Heart Crinkle Mat
Pin your padding between your main fabric and one piece of lining fabric, pin them together and sew around the edge.  We used a zigzag stitch.


Crafting with Cats Valentine's Special ©BionicBasil® Valentine Heart Crinkle Mat

Your heart should now look like this.

Crafting with Cats Valentine's Special ©BionicBasil® Valentine Heart Crinkle Mat
Take your ruler and tailors chalk and mark your quilting lines.

Mew don't have to do this but we think it looks really nice.


Crafting with Cats Valentine's Special ©BionicBasil® Valentine Heart Crinkle Mat

Sew along your quilting lines, we sewed larger squares as it looked better, and your heart should look something like this.  Use a piece of fabric off-cut to rub any tailors chalk off the heart - it should come off furry easily.

Crafting with Cats Valentine's Special ©BionicBasil® Valentine Heart Crinkle Mat
Next, take your quilted heart and place it and your second piece of lining fabric 'right-sides together' pin and sew all the way around the edge with a straight stitch leaving about half an inch / 1cm seam width.  Leave about 5" or 13cm gap so mew can turn it the right way out and stuff the bags inside.

Position the bags inside the heart so they aren't lumpy or bunched up together, then hand stitch the remaining seam closed.

And mew should have something that looks like this:

Crafting with Cats Valentine's Special ©BionicBasil® Valentine Heart Crinkle Mat

It took approximately 90 minutes to make from start to finish, as we always make it up as we go along.  We have an idea of what we want to make, and then we just dive right in.  So we think it shouldn't take more than an hour to make with destructions!


And here's Smoochie testing it, watch for Pandora's total eclipse! MOL


All in all, each of The B Team have had a try and give it all paws up!

Crafting with Cats Valentine's Special ©BionicBasil® Valentine Heart Crinkle Mat
In fact Fudge, much to Smoochie's chagrin got himself on it and refused to move!

*    *    *

And that furiends furry sadly brings us to the end of this Crafting With Cats post, we do hope mew liked it and feel free to post your pawesome crafty pics and ideas on our Facebook page at:


And if there's anything mew'd like us to make, leave a comment and we'll do our best.  

We'll be back on the morrow with another crafty Valentine's post, so do stop by, as mew know how much we love your company.

Epic crafty purrs

Basil & The B Team 


Disclaimer:
We at BionicBasil HQ are not responsible or liable fur any injuries to person/s and/or cat/s, crafting addictions, glue on cats, paper cuts, misplaced pins and needles, cats stealing your supplies, broken scissors, cat fur stuck on your projects, or your project not turning out as planned.  By using this information you hereby agree to indemnify and hold harmless BionicBasil and staff from and against any and all claims for personal injuries or damages of any kind arising from use of any Crafting With Cats posts we may share.

Graphics created with paid licence www.canva.com and www.pizap.com 

Monday 12 July 2021

Crafting With Cats ~ Part IV Revisited ~ How We Made An Epically Epic Rainbow Pom Pom Hammock

Crafting with Cats Banner ©BionicBasil®

Supurr Monday Greetings Pawesome Pals

Thanks fur joining for us for a revisit of Part IV of our Crafting with Cats segment. 

If mew missed any of our previous CWC posts, stop by the Crafting with Cats Page and see all our previous projects, and mew don't have to be an expert in anything to make any of them. Plus, we offer workarounds and no-sew projects for those who don't like to sew.


**Purrlease Note**

All Crafting with Cats ideas and creations are of our own design and we share them fur purrrsonal/home use only.

Copyright ©BionicBasil®

*     *     *

This week we're making this!

Copyright ©BionicBasil® Crafting with Cat Epic Pom Pom Hammock

What We Used:

A gazillion pom poms [MOL just kidding 1000 x 1" should suffice!]
Glue gun and lots of glue sticks
Fabric backing
Timber and wood screws
Saw
Drill 
Paint - if mew want to paint it. [We used white gloss.]
Staple gun and/or upholstery tacks
A length of ribbon or trim


Now we made a supurr king size cat hammock, so if mew make a small one then obviously mew'll use less pom poms, glue and timber etc...

Optional cat/s fur snoopervising and general assistance


Are mew ready?

We'll start with the supurr easy bit

Furst, we'd suggest than mew sort the pom poms out, keeping the colours separate. Luckily we had a few spare baskets this week, absolutely purrfect timing as they ended up as pom pom sorters.

Copyright ©BionicBasil® Crafting with Cat Epic Pom Pom Hammock

Next get your fabric, cut it to size and give it a quick iron, then place it on a flat surface.

Copyright ©BionicBasil® Crafting with Cat Epic Pom Pom Hammock

Now we're hot gluing straight onto the fabric, so if mew luffs your table purrlease protect it as the glue will soak through and possibly ruin the finish.  Our table is purely fur crafting/sewing/painting etc... so we just give it a good clean between projects.

Copyright ©BionicBasil® Crafting with Cat Epic Pom Pom Hammock

Ok, get your glue gun ready, oh and do make sure mew have plenty of glue sticks.

Copyright ©BionicBasil® Crafting with Cat Epic Pom Pom Hammock

We ran out at this point and the P.A. had to do a quick re-order! MOL 

Thank Cod for Amazon Prime...

Copyright ©BionicBasil® Crafting with Cat Epic Pom Pom Hammock

And voila approximately 800 pom poms later [MOL!] and we're ready to move onto the frame. I did have to come and snoopervise the P.A. at this point and do my 'quality control check' for loose pom poms, and yes, they're all firmly stuck in place.

*     *     *

Making The Frame

I do suggest mew familiarize yourself with the wood mew are going to be using, I do take my wurk furry seriously so this step did take quite a while.
Copyright ©BionicBasil® Crafting with Cat Epic Pom Pom Hammock

Furst mew need 8 cut lengths the same size and 4 spacers.
Copyright ©BionicBasil® Crafting with Cat Epic Pom Pom Hammock

Check that mew are putting it together squarely, I had to intervene at this point with my purrtractor just to check! MOL  Aftur rigorous checking, the second one was made.
Copyright ©BionicBasil® Crafting with Cat Epic Pom Pom Hammock

Place the spacers on the corners, then put the second square on top and screw together.  So mew have something like this below.  We suggest that mew pre-drill the screw holes, as this makes it so much easier.
Copyright ©BionicBasil® Crafting with Cat Epic Pom Pom Hammock

So now your frame is complete, mew can either leave it au natural or mew can paint it.  We used gloss paint.
Copyright ©BionicBasil® Crafting with Cat Epic Pom Pom Hammock

*     *     *

Putting it all together!

Now comes the really fun part, putting the hammock onto the frame. Now mew'll notice here that the pom poms don't go all the way to the edge of the frame, well there's method in our madness which will be revealed in a moment.

So now mew need to place the pom pom hammock onto the frame and get a gentle fall happening towards the middle of the frame. Staple one side, then the opposite side furst, then repeat on the two remaining sides. Slowly wurk your away around the entire frame until it looks like the bottom right picture. Trim off any excess fabric, so mew have a nice clean edge.  Take the remainder of your pom poms and finish gluing them right up to the edge of the frame, so mew have a purrfect edge. Finally mew can use a wide ribbon or upholstery trim to cover the staples. We opted fur a nice wide blue grosgrain ribbon and glued it on as at the final hurdle the P.A. couldn't find her upholstery pins/tacks.

Copyright ©BionicBasil® Crafting with Cat Epic Pom Pom Hammock

And finally, mew should have something like this ~ isn't it epically epic or what!?
Copyright ©BionicBasil® Crafting with Cat Epic Pom Pom Hammock


So what was The B Teams verdict?

Well actually we luffs it, Amber got furst dibs when it was in the lounge.  Pandora and Fudge were circling like sharks as she got her boose comfy.
Copyright ©BionicBasil® Crafting with Cat Epic Pom Pom Hammock

Then it was moved into its final position upstairs in the new office under the corner desk, where Smoochie promptly got himself, his catnip nana and Mr Ratty installed post haste! MOL

Copyright ©BionicBasil® Crafting with Cat Epic Pom Pom Hammock

It was made in 2017, and still is a in 2021 a total hit at BBHQ, right now it's in the bedroom and Parsley loves it there.


If there's anything mew'd like us to make, leave a comment and we'll do our best, and don't furget that mew can now purrchase epically cool stuff for cats made by us, at our new Kwerky Kat Boutique at Etsy.

We'll be back on Wednesday with a spot of Gardening with Cats, so get your gardening gloves ready and let's get dirty! MOL

Epic crafty purrs

Wing Commander Basil & The B Team


Disclaimer:
We at BionicBasil HQ are not responsible or liable fur any injuries to person/s and/or cat/s, crafting addictions, glue on cats, paper cuts, misplaced pins and needles, cats stealing your supplies, broken scissors, cat fur stuck on your projects, or your project not turning out as planned.  By using this information you hereby agree to indemnify and hold harmless BionicBasil and staff from and against any and all claims for personal injuries or damages of any kind arising from use of any Crafting With Cats posts we may share.
Graphics created and used under paid licence www.canva.com and www.pizap.com
Monday 10 June 2019

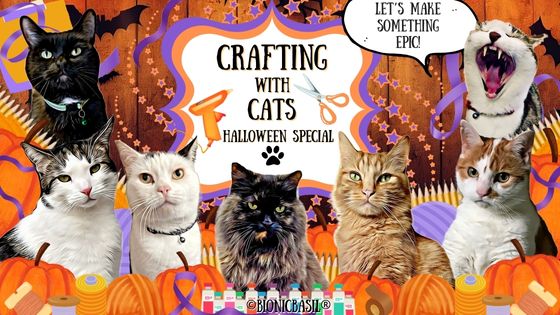
Crafting With Cats ~ Part IV ~ How To Make A Supurr Luxe Rainbow Pom Pom Hammock with The B Team

Welcome to
Supurr Monday Greetings Pawesome Pals

Thanks fur joining fur us fur a revisit to Part IV of our Crafting with Cats segment, and one of our all time favourite crafting projects which we still love today, and young Melvyn has really taken to it since his arrival! MOL  

If mew missed any of our previous CWC posts, here's the links:


Easter Catnip Eggs

*    *    *

**Purrlease Note**

All Crafting with Cats ideas and creations are of our own design and we share them fur purrsonal/home use only.

  So purrlease do not copy fur commercial/resale purrposes.

Copyright ©BionicBasil®

*     *     *

This week we're making this!


What We Used:

A gazillion pom poms [MOL just kidding 1000 x 1" should suffice!]
Glue gun and lots of glue sticks
Fabric backing
Timber and wood screws
Saw
Drill 
Paint - if mew want to paint it. [We used white gloss.]
Staple gun and/or upholstery tacks
A length of ribbon or trim

Now we made a supurr king size cat hammock, so if mew make a small one then obviously mew'll use less pom poms, glue and timber etc...

Optional cat/s fur snoopervising and general assistance


Are mew ready?

We'll start with the supurr easy bit

Furst, we'd suggest than mew sort the pom poms out, keeping the colours separate. Luckily we had a few spare baskets this week, absolutely purrfect timing as they ended up as pom pom sorters.


Next get your fabric, cut it to size and give it a quick iron, then place it on a flat surface.


Now we're hot gluing straight onto the fabric, so if mew luffs your table purrlease protect it as the glue will soak through and possibly ruin the finish.  Our table is purely fur crafting/sewing/painting etc... so we just give it a good clean between projects.


Ok, get your glue gun ready, oh and do make sure mew have plenty of glue sticks.


We ran out at this point and the P.A. had to do a quick re-order! MOL 

Thank Cod fur Amazon Prime...


And voila approximately 800 pom poms later [MOL!] and we're ready to move onto the frame. I did have to come and snoopervise the P.A. at this point and do my 'quality control check' fur loose pom poms, and yes, they're all firmly stuck in place.

*     *     *

Making The Frame

I do suggest mew familiarize yourself with the wood mew are going to be using, I do take my wurk furry seriously so this step did take quite a while.

Furst mew need 8 cut lengths the same size and 4 spacers.

Check that mew are putting it together squarely, I had to intervene at this point with my purrtractor just to check! MOL  Aftur rigorous checking, the second one was made.

Place the spacers on the corners, then put the second square on top and screw together.  So mew have something like this below.  We suggest that mew pre-drill the screw holes, as this makes it so much easier.

So now your frame is complete, mew can either leave it au natural or mew can paint it.  We used gloss paint.

*     *     *

Putting it all together!

Now comes the really fun part, putting the hammock onto the frame. Now mew'll notice here that the pom poms don't go all the way to the edge of the frame, well there's method in our madness which will be revealed in a moment.

So now mew need to place the pom pom hammock onto the frame and get a gentle fall happening towards the middle of the frame. Staple one side, then the opposite side furst, then repeat on the two remaining sides. Slowly wurk your away around the entire frame until it looks like the bottom right picture. Trim off any excess fabric, so mew have a nice clean edge.  Take the remainder of your pom poms and finish gluing them right up to the edge of the frame, so mew have a purrfect edge. Finally mew can use a wide ribbon or upholstery trim to cover the staples. We opted fur a nice wide blue grosgrain ribbon and glued it on as at the final hurdle the P.A. couldn't find her upholstery pins/tacks.


And finally, mew should have something like this ~ isn't it epically epic or what!?

So what was The B Teams verdict?

Well actually we luffs it, Amber got furst dibs when it was in the lounge.  Pandora and Fudge were circling like sharks as she got her boose comfy.

Then it was moved into its final position upstairs in the new office under the corner desk, where Smoochie promptly got himself, his catnip nana and Mr Ratty installed post haste! MOL


 I actually spent the weekend convalescing on it, so I can safely say the hammock was a total hit, so much so that the P.A. is making two more smaller ones so there's plenty to go around! 

*    *    *

And that furriends furry sadly brings us to the end of our crafting with cats post today, we do hope mew liked it and feel free to post your pawesome crafty pics on our Facebook page at:


And if there's anything mew'd like us to make, leave a comment and we'll do our best.

We'll be back on Wednesday with The Pet Parade Blog Hop, so do stop by and hop around the wurld with us, Dash Kitten and Barking from the Bayou as mew know how much we love your company.

Bestest crafty purrs

Wing Commander Basil & The B Team xox


Follow Basil & The B Team @BionicBasil® on InstacatTwitter and Facebook

Disclaimer:
We at BionicBasil HQ are not responsible or liable fur any injuries to person/s and/or cat/s, crafting addictions, glue on cats, paper cuts, misplaced pins and needles, cats stealing your supplies, broken scissors, cat fur stuck on your projects, or your project not turning out as planned.  By using this information you hereby agree to indemnify and hold harmless BionicBasil and staff from and against any and all claims for personal injuries or damages of any kind arising from use of any Crafting With Cats posts we may share.
Graphics created and used under paid licence www.canva.com and www.pizap.com