Showing posts with label Kitty. Show all posts

Monday 30 October 2023

**THE NEXT BEST THING WE'VE EVER MADE** Spooky Crafting With Cats ~ Part 31 ~ Halloween Special ~ How We Made the **TWO IN ONE CAT SCRATCHER**

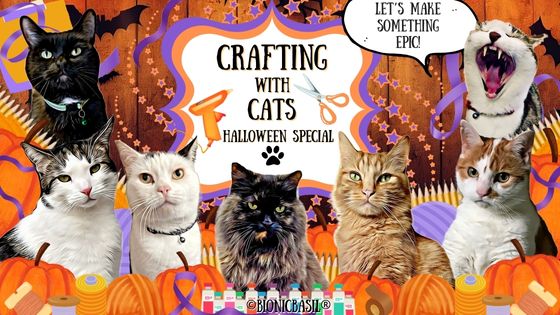
The B Team's Halloween Crafting with Cats Banner  ©BionicBasil® October  23

Supurr Spooky Greetings Pawesome Pals

Thanks for joining us for Part 31 of our Crafting with Cats segment. Mew know we have so much fun making all this fun stuff for feline enrichment, and we hope mew enjoy seeing it and/or making it too. 

If mew missed any of our previous CWC posts, stop by the Crafting with Cats Page and see all our previous projects, and mew don't have to be an expert in anything to make any of them. Plus we offer workarounds and no-sew projects for those who don't like to sew.

*    *    *
**A quick note before we begin**

All Crafting with Cats ideas and creations are of our own design, and we share them for purrsonal/home use only.

  So purrlease do not copy for commercial/resale purrposes.

Copyright ©BionicBasil®

*     *     *

THE Two In One Cat Scratcher


Crafting with Cats - Halloween 2023 ©BionicBasil® The Two in One Cat Scratcher

Isn't it epic?

Halloween Pawty Divider ©BionicBasil®

What We Used:

5 x pre-made cardboard cat scratchers (£17.99)

1 x  large cardboard box

Non Toxic glue + Glue gun

Black spray paint (+ face mask)

Black non-toxic paint

1 x cardboard tube

Mini Ghosts

White + black felt fabric

4 x pom poms

catnip 

stuffing

**see Gordon the Ghost link below, and just reduce the pattern size**

Halloween Pawty Divider ©BionicBasil®

Let's Get Started

CHAOS IN THE CRAFT ROOM

Crafting with Cats - Halloween 2023 ©BionicBasil® The Two in One Cat Scratcher - Steps 1 - 4

1. & 2. We had bought these five cardboard scratchers from Amazon with the intent of making something totally different, however they were much smaller than we thought, so idea one, was literally tossed out of the window. And a few minutes later we had another idea, and that  needed one large Amazon box too.

(Note: mew could make your own scratchers - see our tutorial here)

3. Making it up as we went along, this is what we decided. First we cut all the flaps off. And cut the side of the box out. 

4. This is what it looked like.

Crafting with Cats - Halloween 2023 ©BionicBasil® The Two in One Cat Scratcher - Steps 5 - 8

5. 6.  We repeated on the other side and this is how it looked.

 7. & 8. Next it was spray painted - always use a mask - and #8 was after a couple of coats   
(we didn't have time to apply more paint). 

Crafting with Cats - Halloween 2023 ©BionicBasil® The Two in One Cat Scratcher - Steps 9 - 12

9. & 10. Next we glued four of the scratchers in place to the back.

11.  Then we glued the last one in the bottom.

12.  Using one of the flaps we measured to make an infill piece.

Crafting with Cats - Halloween 2023 ©BionicBasil® The Two in One Cat Scratcher - Steps 13 -16

13. 14. & 15.  This is what the infill looked like, we scored the sides along the line and bent them into postion, before gluing in place..

16.   We repeated the previous steps to make infills for the other side and front.

Crafting with Cats - Halloween 2023 ©BionicBasil® The Two in One Cat Scratcher - Steps 17 - 20

17. 18. & 19.  Taking a long wrapping paper cardboard tube, we cut it in half and glued along the sides of the other scratchers. So it filled in the tiny gap, and this is what it looked like.

20. Next we scored and folded the top flap in half.

Crafting with Cats - Halloween 2023 ©BionicBasil® The Two in One Cat Scratcher - Steps 21 - 24

21. We glued it together.

22. Then we glued the flap down securing it to the edges of the box. Then we painted the rest of the cardboard black.

23. If mew look at the top corner, mew can see we added a corner piece, as when we initially cut the flaps off in step 2, we were a bit slap dash and didn't cut it level so were left with a small gap, and this piece just covered our butchery! MOL

24. And this is what your Two in One Cat Scratcher should look like now. 

And there mew have it, only 24 easy peasy, supurr simple steps to making your very own Two in One Cat Scratcher! MOL 

It took just over a couple of hours to make, so not that long, and that's us making something that we've never made before so, it should take mew much less time.

Plus we made the two small catnip ghosts and added the catnip pumpkins from the Haunted House project. See links below for instructions and other Halloween crafting projects.

And we know mew're wondering why it's a two in one cat scratcher, well it was intially desgned to go up a wall, thereby offering a nice tall scratching scenario, but then we realised that it could also be used flat, and it makes a wunderpurr bed and scratcher, so the choice is yours on what your purrsonal preference is, vertical or horizontal! MOL

Smooch and Fudge are demonstrating the horizontal position, and there's more than enough room for two cats, two ghosts and three pumpkins!

Crafting with Cats - Halloween 2023 ©BionicBasil® The Two in One Cat Scratcher - Horizontal with Smooch and Fudge

And Fudge demonstrating the vertical position.

Crafting with Cats - Halloween 2023 ©BionicBasil® The Two in One Cat Scratcher - Vertical with Fudge

Fudge has pretty much claimed ownership of it, and is currently reclining (Sunday Morning - we only finished it late on Caturday) in the horizontal position in the sitting room! MOL

And for those who'd just like to watch us make it, here is the video - it's only 28 seconds long for those short on time! 

We'll share The B Team using it on The Midweek News, as we just didn't get time to add all the footage in and get posted on time.

Direct link to watch on YouTube

LET'S GET SCRATCHING!

What do mew think to The Two in One Cat Scratcher?

We think it turned out pretty well, given that we had no clue what we were making, and that we were really short on time due to the flood.

See our previous Halloween Crafting Posts Below:

Check out the epically epic Spooky House and Catnip Pumpkins 


and

The Halloween Crafting Special from 2019

The Pumpkin Pouffe with Catnip Leaves and Kicker Stalk Creepy Crafting with Cats ©BionicBasil®Halloween Special

Featuring oodles of fun projects including this giant furry pumpkin bed with catnip leaves and a catnip kicker stalk.


Gordon the Ghost Spooktacular Meowoleen Snuggle Mat 2020

Creepy Crafting With Cats Part XX ©BionicBasil® Spooktacular Meowoleen Snuggle Mat


The Trick or Treat Monster Truck aka MOG 1

DIYT cardboart unimog for cats with working lights, tow rope, aerial, 6x6,

Isn't it epic?

Here's how we made it ~ Click here


Check out our YouTube Channel for all our fun DIY Cat Stuff videos.


Halloween Pawty Divider ©BionicBasil®


And that furiends furry sadly brings us to the end of our 31st Crafting with Cats post, we do hope mew enjoyed it, and if mew decide to make your furry own Two in One Cat Scratcher tag us on social media @BionicBasil.

Don't furget to check our yearly Halloween tradition of Spooky Story Time tomorrow in a **Brand New** B Team adventure called **Claws of Terror**, as we know mew won't want to miss that! MOL 

Spooky purrs

MUWAHAHAHAHAHAHAHAAAAAAAAA

Wing Commander Basil & The B Team 


Halloween Pawty Divider ©BionicBasil®

Don't furget to subscribe and never miss another post!

Halloween Pawty Divider ©BionicBasil®
Disclaimer:
We at BionicBasil HQ are not responsible or liable for any injuries to person/s and/or cat/s, crafting addictions, glue on cats, paper cuts, misplaced pins and needles, cats stealing your supplies, broken scissors, cat fur stuck on your projects, or your project not turning out as planned.  By using this information you hereby agree to indemnify and hold harmless BionicBasil and staff from and against any and all claims for personal injuries or damages of any kind arising from the use of any Crafting With Cats posts we may share.

Halloween Pawty Divider ©BionicBasil®
Graphics created with paid licence www.canva.com 

Music used under license from SoundStripe. Track:Rave Kids Artist: PALA   

Saturday 22 July 2023

**NATIONAL CRAFTS FOR YOUR SHELTERS DAY** Crafting with Cats ~ How We Made Supurr Easy Catnip Cushions Using Fabric Scraps

CRAFTING FOR YOUR SHELTERS DAY! @BionicBasil®

Welcome to another 

NATIONAL CRAFTS FOR YOUR SHELTERS DAY

It's Day Three of our Annual Craft Fest for National Crafting for Your Shelters Day, and today we're finishing with a brand new project.

If mew're thinking of making things for your local shelter, we have projects to suit all crafting levels and no-sew ideas too, for those who aren't into sewing or just don't like it! MOL

If mew missed our two previous posts here are the links:


SO LET'S CRAFT ON

Supurr Easy Catnip Cushions

Crafting with Cats - Crafting For Your Shelters 2023 ©BionicBasil® Fudge and The Catnip Cushions

Mew know how we like to upcycle, recycle and use stuff we already have to make new things, so everything we used today was already kicking about the craft room.

And if mew don't have any spare fabric or scraps, mew could always use an old item of cotton clothing that purrhaps mew were thinking of donating to a charity shop or clothing bank. Using old clothing to make new things is a great idea, especially if mew love the fabric.

What We Used:

Fabric Scraps

Wadding/Stuffing Scraps

Catnip (Homegrown organic)

Sewing machine

Thread
 
  Scissors 

Iron + Ironing Board

>^.^<

Optional Craft Room Snoopervisor
 
Today Pandora was in charge of the craft room!

Crafting with Cats - Crafting For Your Shelters 2023 ©BionicBasil® Pandora, The Craft Room Snoopervisor

*    *    *

Let's Begin

Crafting with Cats - Crafting For Your Shelters 2023 ©BionicBasil® Supurr Easy Catnip Cushion - 1-4

1. We used a couple of off-cuts from some fat quarters. (Approx 20" x 7" or 50 cm x 17.8 cm)

2. After pressing we laid them flat, to gauge how many cushions we could make.

3. Folding in half, we cut down the fold.

4. Fold again and we cut along the fold, so we had enough for 4 x cushions.

Crafting with Cats - Crafting For Your Shelters 2023 ©BionicBasil® Supurr Easy Catnip Cushion - 5-8

5. Pandora had to sign off on the sizes at this point! MOL 

6.  We decided to make our cushions with a different design on each side.

7. & 8. Pin the right sides together. And sew around the edge using a straight stitch. Remembering to leave a gap of approx 2" or 5 cm for the stuffing and catnip.

Crafting with Cats - Crafting For Your Shelters 2023 ©BionicBasil® Supurr Easy Catnip Cushion - 8-12

9. Mew can't really see, but these are all stitched.

10. & 11. Snip the corners off at an angle. And trim any excess fabric from the seam edge.

12. Turn right sides out and they should look like this after a quick press with the iron.

Crafting with Cats - Crafting For Your Shelters 2023 ©BionicBasil® Supurr Easy Catnip Cushion - 13-16

13. Next top stitch around the edge of the fabric, remember to leave the gap open.

14. & 15. & 16. Then take your wadding plus catnip and stuff your cushions. We used a wooden chopstick to push the wadding in the corners.

Crafting with Cats - Crafting For Your Shelters 2023 ©BionicBasil® Supurr Easy Catnip Cushion - 17-20

17. Once they are filled to your total catisfaction, they should look like this.

18. Next, top stitch the gap shut.

19. & 20. And now mew have 4 supurr epic catnip cushions which measure approx  5" x 6.5"  or 12.7 x 16.50 cm (depending on how big your seams are if mew used similar size fabrics scraps to us).

Let's See If The B Team Gave Them The Paw Print of Approval

And surprise, surprise, look who claimed them all! MOL

Crafting with Cats - Crafting For Your Shelters 2023 ©BionicBasil® Fudge Claimed The Catnip Cushions

Watch the video:


Direct link to watch on YouTube - Click Here.

Fudge took ownership of all the catnip cushions for the video, but Melvyn, Smooch and Parsley did get to try them out later!

They all said, "The catnip cushions were epically epic!"

Now we'll make some more and send them to a local cat shelter, well we can't send those as they've been slobbered on! MOL


And that furiends furry sadly brings us to the end of our mini craft-fest, we do hope mew enjoyed it and we'll be back tomorrow with our usual selfies post and new UK Travel destination, so we do hope you can join us, until then...

Keep calm and craft on

Epically crafty purrs

Wing Commander Basil & The B Team


If mew missed any of our previous crafting posts, visit our dedicated crafting page: 


Disclaimer:
We at BionicBasil HQ are not responsible or liable fur any injuries to person/s and/or cat/s, crafting addictions, glue on cats, paper cuts, misplaced pins and needles, cats stealing your supplies, broken scissors, cat fur stuck on your projects, or your project not turning out as planned. Be super careful if you're using cutting tools, take your time and always cut away from yourself and we do recommend that you wear some special cut-resistant gloves like this: Cut Resistant Gloves for Safety. these are just an example we found on Amazon and this is not an affiliate link. This project is not suitable for younger readers without parental/adult help. By using this information you hereby agree to indemnify and hold harmless BionicBasil and staff from and against any and all claims for personal injuries or damages of any kind arising from the use of any Crafting With Cats posts we may share.  

Graphics created with paid licence www.canva.com    Paid Music Licence Soundstripe   Artist: Revielle - Track: You Got This

Thursday 20 July 2023

**NATIONAL CRAFTS FOR YOUR SHELTERS DAY** Crafting with Cats ~ How We Made Cute Pots For Our Cat Grass **SEE OUR EPICALLY FUNKY CAT GRASS POTS**

CRAFTING FOR YOUR SHELTERS DAY! @BionicBasil®

Welcome to another 

NATIONAL CRAFTS FOR YOUR SHELTERS DAY

It's National Crafting for Your Shelters Day, and we thought we'd do something a bit different.

Mew can use this idea to offer a nommable treat to kitties in shelters, who may be in need of a little grass therapy! MOL

As we love to upcycle, recycle and re-purpose items here at BBHQ, today's project can be made purretty much without having to buy anything in.


SO LET'S CRAFT ON

Are mew bored silly with horrendously dull and uninspiring pots to grow your cat grass in? Us too, so we decided to funk things up a bit, and this is what we came up with.

Crafting with Cats ©BionicBasil® Epically Funky Grass Pots

What We Used:

Plastic tubs

Jazzy paper

Laminator + pockets

Flower embellishments

Glue non-toxic
 
Scissors or craft knife**


>^.^<

**purrlease be super careful if mew're using a craft knife or cutting tool, take your time and always cut away from yourself, and we always recommend using cut-resistant gloves like this: Cut Resistant Gloves for Safety. These are just an example we found on Amazon and this is not an affiliate link. 

*    *    *

Let's Begin

Crafting with Cats ©BionicBasil® How To Make Cute Pots For Your Cat Grass a

1. We recycled/repurrposed two plastic tubs, these were ideal, the P.A. said the chocolates were purretty nommable too! MOL  And the lids make purrfect plant pot trays/dishes too.

2. Next, we put some holes in the bottom - we used a bradawl tool, a small craft hammer and placed the tub bottom-down on a piece of flat wood to protect the table before punching the holes through.

3. This is our holographic jazzy paper, we chose pink and red.
 
4. & 5. Place jazzy paper in laminating pouches and laminate. This step isn't necessary but we found when watering the pots can get wet, and the laminated paper is more robust.

6. We measured the depth and circumference of the tub and cut laminated paper to size. 

7. Glue the laminated paper to the tubs.

8. Get oodles of fun embellishments.

9. Decorate the tub.

And now we have some epically funky grass pots! MOL


Growing Some Nibbles

What We Used:

Organic compost

Gravel

Cat grass seeds

A sunny windowsill or warm location

Crafting with Cats ©BionicBasil® How To Make Cute Pots For Your Cat Grass a

1. Put some stones/gravel in the bottom, this will assist drainage, and the extra weight will help prevent the pot from tipping over during effervescent grass nomming sessions.

2. Add organic compost and fill to 2/3 full.

3. Sprinkle in cat grass seeds.

4. Top up with more compost. Don't fill it right to the top, leave space for watering.

5. Water and place in a warm spot. A sunny windowsill is ideal, mew can also cover with clingfilm to speed up germination. As it's the summer we just leave ours in the potting shed where it's nice and toasty.

6. Keep watering or spritzing with a spray bottle daily; a few days later, it should look like this.

7. The red pot was a little slower growing than the pink one, but it soon caught up.

8. Ready to NOM!

9. We use all kinds of little plastic tubs to grow cat grass in at BBHQ; small ice cream tubs, ready meal containers, yoghurt pots etc... just give them a good clean furst. 

What's this got to do with Crafting For Your Shelters Day we hear mew ask? 

Well, fluffy furiends mew could grow several little pots of cat grass to take to your local shelter, and we're sure the kitties there would love some fresh noms. And mew could use plain tubs or plastic pots, no need to decorate.

To see a more in-depth tutorial on growing cat grass, visit our Gardening with Cats post.

Watch the video

See what Melvyn and Fudge thought...


...or watch direct on YouTube.

We think that was a hit and such a stylish way to NOM your greens! MOL


And that furiends furry sadly brings us to the end of today's post, though we'll be back on the morrow with how to make a  Mini Cardboard Scratcher, so we do hope you can join us, until then...

Keep calm and craft on

Epically crafty purrs

Wing Commander Basil & The B Team


If mew missed any of our previous crafting posts, visit our dedicated crafting page: 


Disclaimer:
We at BionicBasil HQ are not responsible or liable fur any injuries to person/s and/or cat/s, crafting addictions, glue on cats, paper cuts, misplaced pins and needles, cats stealing your supplies, broken scissors, cat fur stuck on your projects, or your project not turning out as planned. Be super careful if you're using cutting tools, take your time and always cut away from yourself and we do recommend that you wear some special cut-resistant gloves like this: Cut Resistant Gloves for Safety. these are just an example we found on Amazon and this is not an affiliate link. This project is not suitable for younger readers without parental/adult help. By using this information you hereby agree to indemnify and hold harmless BionicBasil and staff from and against any and all claims for personal injuries or damages of any kind arising from the use of any Crafting With Cats posts we may share.  

Graphics created with paid licence www.canva.com    Paid Music Licence Soundstripe   Artist: PALA  Track: Astro Vision